Tuesday, August 6, 2013

Fabric Marker Alternative to Iron on Transfers

Who DOESN'T love the movie What About Bob? My friends and I have worked quotes from the dinner scene into every imaginable conversation. Naturally when we sit down to any sort of delicious food, what follows is a string of pleasure moans just like Bob (Bill Murray) as he enjoys the delicious meal cooked by his psychiatrist's wife (much to his psychiatrists chagrin).


Having said that, one of the aforementioned friends is getting married, and I badly wanted to make her an apron with a picture of Bob enjoying the crap out of a scrumptious meal.  Great idea right?!?
I thought so. So I bought a blank apron at Michael's. My problem was, I hate those horrible iron on transfers. In my experience, they fade quickly, and often leave a faint outline of residue around the artwork. Because the print-it-yourself ones are made to work with inkjet printer ink, they never really seem that bold or vibrant to me. That may just be my experience, but I found a great alternative to the iron-on-transfer.... a black fabric marker!

MATERIALS NEEDED: A plain apron, t-shirt, or whatever; fabric marker; carbon paper for tracing; pencil; a photocopy of your transfer image; and... a flat surface.


First thing I did was go online to find a screen cap from the movie. Here is Bob chowing down on some mighty fine corn.

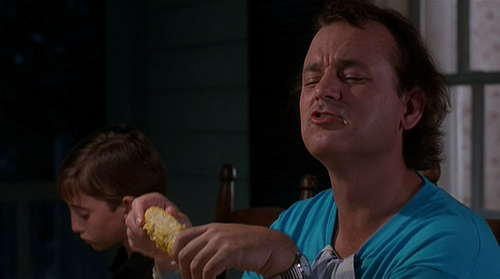
"Is this hand-shucked?"

Next I printed the photo at the size needed to fit your material (for me it was 11x17"). You may have to fiddle with the contrast so that when it prints there is visible contrast of lights and darks (for easier tracing later on).

Bear in mind, this project will not produce a photo-copy effect on your apron/t-shirt. I was looking for a simple black and white outlined image. Sometimes you can get this effect saving as a monochrome bitmap in Paint, or using the photocopy filter or threshold function in photoshop, but neither gave me the desired effect.

Fiddling with settings in a black/white image may make tracing easier

Here's a tip which helped me in the tracing process: Before laying the photo out on my fabric, I first used a sharpie to trace the main outlines of his face, shoulders, and hands, and only selected certain details and shadow spots to highlight. The great thing about tracing first with a sharpie is if you've used regular paper (not thick paper) to print your image, you can flip it over and the sharpie shows through.It really helped me envision what the final outline would look like.


I lay out my apron on a flat surface, placed the carbon copy paper face-down onto the fabric, and lay my printed photo on top with my desired placing. I gently taped it so my ape arms wouldn't jostle it out of place while I was tracing. Then I took a blunt pencil (so it doesn't accidentally rip the paper) and traced away!


Finished trace

The hard part was done and all that was left was the fun part. Using the black "Marvy" brand fabric marker I purchased at Michael's, I traced the carbon outlines and filled in the areas that were supposed to be shadows. These markers came in a variety of colours and were also available in fine tip (which would have been handy for the lettering, but the angled point of the fat tip marker worked fine too). I liked that the marker didn't die on me. I like it when things don't die on me.


Careful... caaaarefullll...


And TA DA! All finished. Just in case this needed to be heat-set (although the marker says "no ironing required", I've heard its best for best results, so I threw it in the drier for a few minutes to set.


It looks great, and I hope my friend will enjoys it whenever she cooks a scrumptious feast for those annoying but loveable house guests!


Monday, May 28, 2012

Scout Handmade + Vintage Market

This year my new years resolution was to use my artistic and creative abilities on a regular basis. I did pretty good until February, preparing for my wedding, but after that I have massively failed. True, I am a graphic designer by day, but to me, that so doesn't count. I was going in the right direction when I opened my Etsy shop, LoveDoveCreations, but lets just say business hasn't been booming (....yet?).

On the weekend my mom and I decided to check out Scout Handmade + Vintage Market here in Abbotsford. Admittance was $2, and it was totally worth it just for the "eye candy" and to reignite the creative desire in me that's been bogged down lately with budgeting and meal planning and insect-watching and cleaning. There were so many good ideas (and lots of ideas that I've had but failed to act on).

Lots of refinished furniture, handmade jewelery and clothing, design ideas, vintage clothing and items, and handmade baby goods. I may or may not have picked up a thing or two for upcoming birthdays!

Enjoy some pics and some links to the local vendors, where I could remember. Otherwise check out the list of vendors for links.


I really liked the dropcloth (been thinking of dropcloth curtains lately)


Raggy Girl (I think...)


 My mom wanted a picture of the cute cushion on this stool but my camera washed it out :/


some vintage delights 


Vintage Home had some absolutely beautiful furniture, pillows, cushions, picture frames, and lots of stuff I recognized from my grandparents!


Ruby Ruby was a fun booth with tons of antiques and knick-knacks. Some steampunk-lookin' stuff too. Sorry random people, but at least you aren't facing the camera. 


No idea who these belonged to, but I thought the burlap around the wire lampshade was pretty cool.

 Another lampshade idea that I loved. Shredded dropcloth.


This was one of my favourite booths. The apothecary bottles like the ones I made for my wedding, the distressed painted cupboard doors and dressers.


More painted lamps and stamped cushions. Unfortunately I can't find which vendor this was!
 

This booth was like a little mini wonder emporium. What compelled me to take a picture was the medical illustration, to remind myself that I've been meaning to make some art using my Gray's Anatomy textbook (instead of just using it to kill spiders...) 


Saturday, May 5, 2012

Steampunk Eye Candy

One of my wedding creations listed on my Etsy shop, LoveDoveCreations, was featured on TotusMel's Wonderkammer. It's a fun blog full of steampunky goodness! If you like steampunk, check out her blog where she features all kinds of eye candy. The featured piece of mine was a custom portrait of my brother-in-law:


Check out the blog for lots of inspiring pictures and artwork!

Sunday, March 18, 2012

Princess Party Invite

My little niece Azaryah had her birthday recently, and I got to make her party invitations! It was great fun! I drew a little cartoon-y version of her, made it all princess-y. Her nickname is "cupcake" so I had to get some of those in there somewhere.

Front

Back

For custom portraits, invites and graphic design check out my etsy shop, LoveDoveCreations.

Monday, March 12, 2012

Steamy, Buttery, Cupcakery


Back in November you'll remember I was busy looking up steampunk wedding cake ideas for my steampunk themed wedding, and I shared some of the amazing cake designs I found in a post called Steampunk Wedding Cake Extravaganzaaaa!

Now I want to share the photos of the steampunk cupcakes I had at my wedding!

Hand-formed fondont decorations and little jewels decorated the cupcakes

We decided to go with cupcakes for our wedding, not only because they are so much easier (no cutting! self serve!) than a cake, but also because after sampling our vendors butter-cream icing, we fell in love with it.

This big mama isn't just all icing... it's a gigantic cupcake inside a white-chocolate shell and smothered in thick, buttery, creamy icing! Mmmmm...

These absolutely beautiful cupcakes were made by Melissa from Buttercream Couture. She hand-made all those gears, cogs, flowers, and other steampunk-y shapes out of fondont. I gave her some ideas of what I liked/didn't like and she took my ideas and went further than I expected with them! Please check out her blog or Facebook page, and enjoy these scrumptious photos of my steampunk wedding cupcakes!

"Our Fantastic Voyage" was the theme of our cupcake display.
Here you can see we used maps, old trunks, and my model airships

By the way, if you're interested to know more about our steampunk themed wedding, head over to Bailey's Brides where our day-of-wedding co-ordinator posted all about it! Thanks to my friend Allyson for the beautiful photos, I'm so glad all the details got captured.

Thursday, March 1, 2012

DIY Steampunk Apothecary Jars


 For my recent wedding, we wanted to create a steampunk feel to the whole thing. We didn't have a large budget, so I wanted to find some very inexpensive ways to keep the steampunk feel going in the table decor. Enter: Tiny apothecary jars!!


What is an apothecary jar exactly, and how is it steampunk?
It's a small, covered jar, formerly used by druggists to hold pharmaceuticals, or dried herbs and remedies. These can be steampunk-y in a mad-scientist way... a 19th century, dusty shelves of strange potions and mixtures with a lone Edison-style light bulb swaying creepily in an office or lab somewhere kind of way, no?

WHAT YOU'LL NEED:


- A collection of apothecary jars (from thrift shops, old vitamin bottles, or dollar stores)
- A collection of apothecary labels, sized to fit onto your bottles and jars, printed on regular paper
- Scissors
- White craft glue
- A bowl
- A cheap paintbrush you don't mind getting glue on
- A bit of water

I found these at Dollar Giant (Dollar Tree in the USA). $1.25 got me 4 of these itty bitty glass vials with cork stoppers. Yes, I may have found a spider egg sack in one of the jars (in the packaging with the lid on... but hey, for that cheap I don't care if it introduces a new species of insect from China...)


Next, I mined the internet for a variety of freely downloadable old apothecary labels. Here are some links to some great free downloadable and printable apothecary labels:


I also happened to have a book of Natural Remedies which contained old labels from the 1800's - 1930's (hope to share those with you soon!) I simply scanned them and sized them all in Illustrator (to be sure they'd fit on my tiny jars), and sent it off to Staples to be printed.

I printed the labels on regular paper stock... this is important, because if they are on paper that is too heavy, they won't glue to the jars! I wouldn't recommend printing these off at home on your inkjet printer, simply because inkjet run easily, and since we are adhering these to the jars with rather wet glue, you don't want to chance it. Laser copies from your local copy place are your best bet.

Cut the labels out, like so:

cut out

final product

I then used a 50/50 mixture of plain old white glue (the same stuff they use in kindergarten) and water, and painted the back of the label using a paintbrush. Carefully place the label onto the glass, wipe away the excess glue, and you have yourself some beautiful did-it-yourself apothecary jars!

I also took a trip to a local thrift shop which had a few very fun jars for some very small change. Different shapes and sizes of jars and bottles really added to the charm, I found.

Yes, that says "Diarrhea Mixture"...


 Some pictures of the finished product on the tables....


Monday, February 13, 2012

Etsy shop open!

Now that I've been a married woman for a week and two days... the honeymoon's over and I figure it's time to start thinking about money again! Just kidding. BUT, I did receive such rave reviews on the wedding invitations, custom portraits, and wine labels I created for my wedding that I've opened an Etsy shop. I'd been planning to do it anyway, but the encouragement has been wonderful! Check it out at LoveDoveCreations!


Related Posts Plugin for WordPress, Blogger...